This page is optimized for desktop computers and tablets. To access it, try one of the following points:
- Access this page from a different device.
- If you’re on a tablet, rotate it.
- Check the “Desktop site” option in your browser settings.
This page is optimized for desktop computers and tablets. To access it, try one of the following points:
Administrators have the capability to manage any user’s configuration and privileges through the User Administration screen.
These settings apply to all Callisto users.
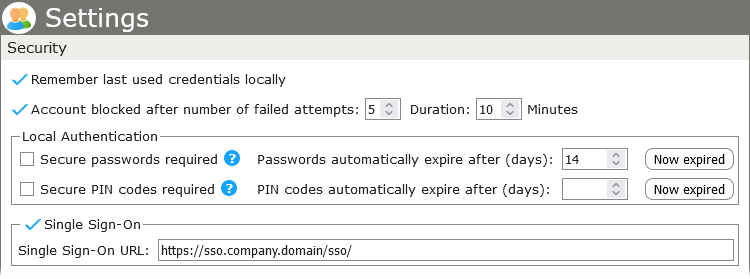
These settings only apply to non-administrator users.
Checking Use CUCM Authentication will authenticate end users using CUCM.

If Presence Service is set to Cisco Unified Presence Server, this section allows you to configure integration with Cisco Unified Presence Server (CUPS) to enable presence status visibility (e.g., available, busy, away) within the system.
| Activated | Check this box to enable CUPS integration. When activated, the system will connect to the specified CUPS server to retrieve and display user presence information. |
| CUPS Server | Enter the host name or IP address of your Cisco Unified Presence Server. This is the server that manages and distributes presence information. |
| Port |
Enter the port number used to communicate with the CUPS server. Common port values include:
|
| Domain |
Enter the domain name associated with your Cisco Unified Communications environment. This is often the same domain used in user SIP addresses (e.g., example.com). Important: Ensure that the CUPS server is correctly configured, reachable from the system, and that proper credentials and licensing are in place. |

| Activated | When checked, the Microsoft Teams presence integration is enabled. |
| Application ID | The Azure Active Directory (AAD) Application (Client) ID used to authenticate over the Microsoft Graph API. |
| Tenant ID | The Directory (tenant) ID from Azure Active Directory associated with your Microsoft 365 organization. |
| Client Secret Value | The secret key generated in Azure for the registered app. This key is used alongside the Application ID to authenticate API requests. |
| Client Secret ID | The identifier for the client secret in Azure AD. This ID used for managing secrets in Azure but might not be required, depending on the integrations. |
| Notification URL | The URL where Microsoft Graph sends change notifications for presence updates. It must be accessible from Azure and is provided by CTModule as part of the subscription to Callisto. |
| Certificate ID | If a certificate is used for encoding/decoding the rich presence data authentication, enter the certificate identifier in this field. |
| Domain |
The domain associated with the Teams user accounts, typically in the form of yourcompany.com. Info: This domain will be applied to all subscribed users. |
| Integration Users section | Used to add Microsoft Teams user credentials for integration. Up to 30 users can be added. |
| New User |
Input the username and password for a user who will be used in the integration process. Click Add to save the credentials. |

Contact Photos section is used to retrieve and display user photos from an LDAP directory (such as Microsoft Active Directory).
| LDAP Server | The hostname or IP address of the LDAP server (e.g., ldap.company.com). |
| Port |
The port used to connect to the LDAP server. Standard ports:
|
| TLS | Enables secure LDAP over TLS (Transport Layer Security). Check this if the LDAP server requires a secure connection. |
| Username | The distinguished name (DN) or login name used to authenticate against the LDAP server (e.g., cn=admin,dc=company,dc=com). |
| Password | Password for the LDAP user account. |
| Base DN | The base distinguished name from where the LDAP search begins (e.g., dc=company,dc=com). |
| Filter | LDAP search filter to locate users, e.g., (objectClass=person) or (sAMAccountName=*). |
| Field | The LDAP attribute that holds the photo data. For Active Directory, this is typically thumbnailPhoto. |
| Cache | Number of days to cache the retrieved contact photos to reduce repeated LDAP queries. |
| Recursive Search | When checked, the search includes sub-containers within the Base DN. |
| Test Contact Photos button | Allows you to verify the configuration and test photo retrieval without saving the settings permanently. |

This section enables centralized administrator authentication through an external LDAP directory such as Microsoft Active Directory. This setup allows administrator credentials to be managed via LDAP, which supports centralized authentication and improved security management.
| LDAP Authentication | Enables administrator login authentication via an LDAP server. |
| LDAP Server | The address (hostname or IP) of the LDAP server used for authentication, e.g., ldap.company.com. |
| Port |
The port number used to connect to the LDAP server:
|
| TLS | Enables Transport Layer Security (TLS) encryption for secure LDAP communication. Typically used with port 636. |
| Base DN (distinguished name) | Specifies the starting point in the LDAP directory tree for searching users, e.g., dc=company,dc=com. |
| Test LDAP Authentication button | Validates the LDAP settings by attempting a connection and search within the specified Base DN. |
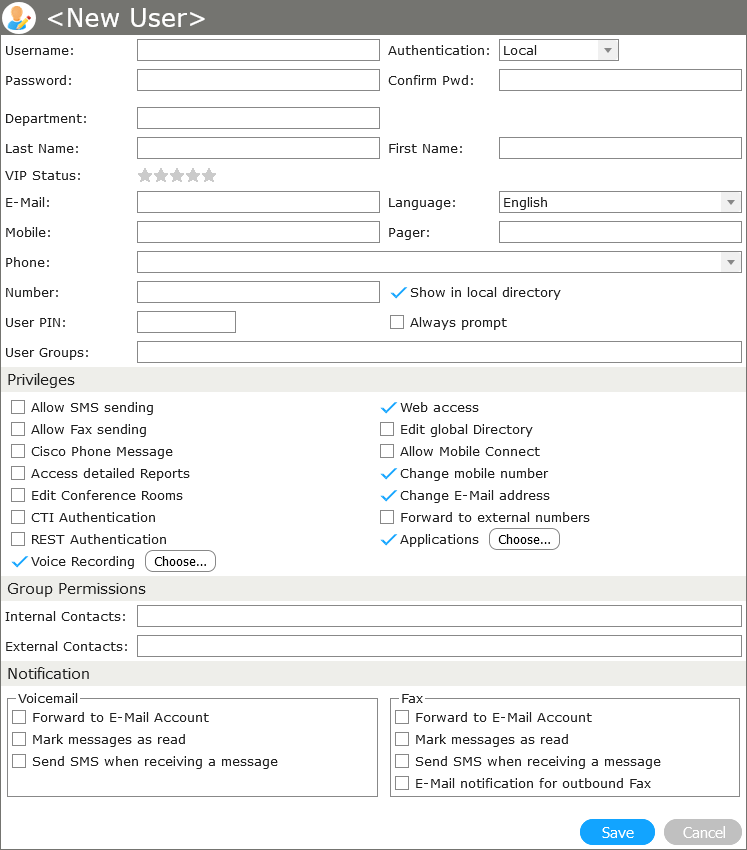
From the User menu, click New User to add a new user. Assign the corresponding IP phone by selecting it from the Phones drop-down menu, enter all other parameters and set the user privileges. When you’re done, click on Save.
Click on the Choose… buttons to access additional settings.
Info: The availability of some privileges depends on the license in use.
| Show in local directory | If checked, this user will be listed in the local directory on Callisto. |
|---|---|
| Always prompt |
The user will always be asked to enter his phone PIN if he is calling the voicemail system. If left unchecked, the PIN needs only be entered if the call doesn’t originate from the user’s telephone extension. |
| Allow SMS sending | Enables sending Fax by choosing Messages > Send SMS on the web GUI. Furthermore, the user can enable SMS notifications for incoming voicemail and fax messages. |
|---|---|
| Allow Fax sending | Enables sending Fax by choosing Messages > Send Fax on the web GUI. The user will also have access to the fax printer driver. |
| Cisco Phone Message | Enables Messages > Cisco Phone Message on the web GUI. |
| Access detailed reports | Enables Reports > Call Reports (global) on the web GUI. If unchecked, the user will find the function Reports > Call Reports (local) instead. |
| Edit Conference Rooms | Enables Conference Rooms > Conference LiveView > Edit on the web GUI. A user can only edit conference rooms that have been added by an admin beforehand. |
| CTI Authentication | Allows usage of the COC Proxy. If unchecked, the user will not be able to log on to the COC client. |
| Voice Recording | Sets options for Voice Recording. See Options – Voice Recording. |
| Web access | Allows the user to log on to the web GUI. |
| Edit global Directory | Enables Directory > New Entry > Category: Global on the web GUI. The user will also be able to edit already existing entries in the global directory. |
| Allow Mobile Connect | Enables Messages > Settings > Forward > Mobile Connect on the web GUI. |
| Change Mobile Number | Enables editing of the mobile number by choosing User > Account > Mobile on the web GUI. |
| Forward to external numbers | Enables using external numbers in the menu Messages > Settings > Forward on the web GUI. Make sure that the internal number length and internal prefix are configured properly in the menu System > System Parameters > Messages. |
| Applications |
Access to individual applications like OIM applications, startup scripts or Cisco Services can be made available to the user. See also Options – Open Application Manager. For many applications, additional privileges can be set to control the scope of access individual users have for each application. Such privileges can be configured by clicking the button labeled “…” next to the application name. Refer to an application’s administration manual for more details. |
| Forward to E-Mail Account | Enables forwarding of voicemails to the user’s email address. |
|---|---|
| Mark messages as read | Marks voicemails in the users inbox at Messages > Inbox on the web GUI as read. |
| Send SMS when receiving a message | Will send an SMS to the user’s mobile phone when a new voicemail is received. To enable SMS notifications, the privilege Allow SMS sending must be checked. |
| Forward to E-Mail Account | Enables forwarding of fax messages to the user’s email address. |
|---|---|
| Mark messages as read | Marks fax messages in the users inbox at Messages > Inbox on the web GUI as read. |
| Send SMS when receiving a message | Will send an SMS to the user’s mobile phone when a new fax is received. To enable SMS notifications, the privilege Allow SMS sending must be checked. |
| E-Mail notifications for outbound fax | Enabling this option will send a confirmation message to the user’s email address whenever a fax message is sent. The user will be notified on both successful and failed fax transmissions. The original fax will be included as an attachment. |
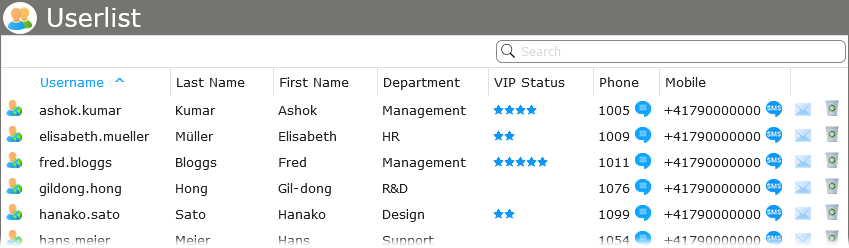
Users’ data can be verified, edited or deleted by choosing User > Userlist.


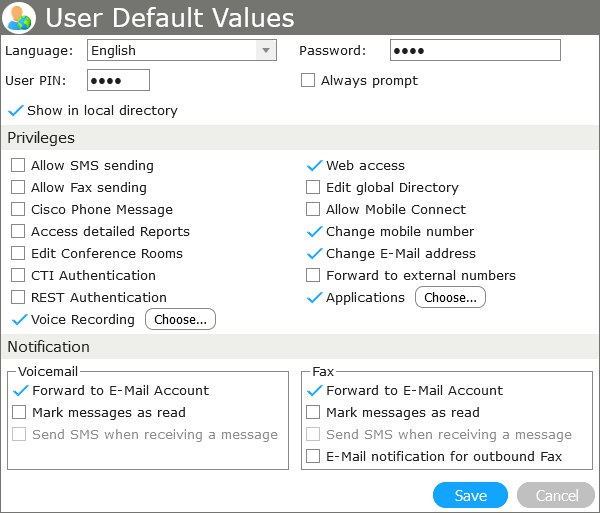
You can customize the default values assigned to new users by choosing User > User Default Values. These default values are also used when importing users (see Import users) if the import doesn’t contain any user information.
User groups are used to manually group together multiple users to a set that can be used in various applications (e.g., granting access rights to all members of a group). Choose User > User Groups to add, edit, and delete user groups. Every group consists of a name, an optional description and an ID which cannot be edited.
To add or remove a user from a group, choose User > Userlist, select the user you want to edit and choose all groups the user is a member of in the User Groups field.
Info: This option is only available on Callisto for UCM, HCS, Webex.
Choose User > Import User to import users by either importing a CSV file or to directly import the users saved in the Unified Communications Manager.
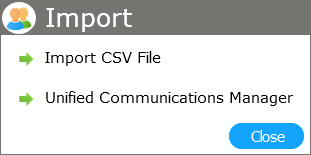
If you choose Unified Communications Manager, an additional dialog box will open which allows you to set XML and SQL import filters: The XML filter is run before importing. The SQL filter’s field definitions match directly to the fields used in the Callisto user database.
Warning: All users previously imported from CUCM that do not match the filter will be deleted.

Example: Post-processing SQL filter for all users that are in the support department, have a phone number between 1000 and 1999, and whose email address ends with @example.com.
(usr_department = 'support')
AND (usr_PhoneNumber >= '1000')
AND (usr_phoneNumber <='1999')
AND (usr_EMail like '%@company.domain')
| Name | Type | Example |
|---|---|---|
| usr_Name | string | 'paul.smith' |
| usr_LastName | string | 'smith' |
| usr_FirstName | string | 'paul' |
| usr_eMail | string | 'user@company.domain' |
| usr_PhoneMac | string | 'SEP002304342534' |
| usr_PhoneNumber | string | '1001' |
| usr_Department | string | 'support' |
If you choose Import CSV File, you will be guided through the import process with additional dialog boxes.
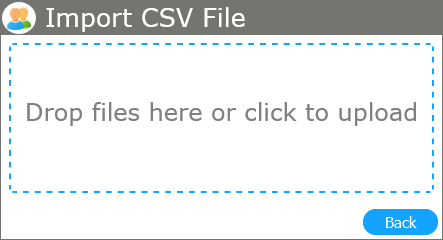
Select the CSV file and it will be uploaded automatically. In the next window, you can assign the source CSV fields to Callisto fields.
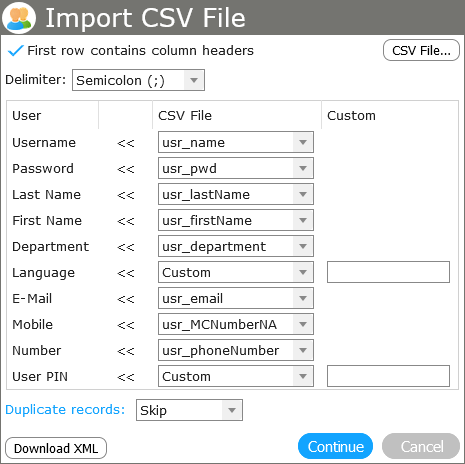
Select the proper Delimiter used in your CSV file. If the file’s first row consists of a header record, check First row contains column headers.
Select the fields that correspond to the data in your CSV file.
Hint: The language is represented as a value between 1 and 5.
Clicking on Duplicate Records gives you the option to determine records that already exist in your contact list. If you select multiple checkboxes, the records where all values are identical will be treated as duplicate records.
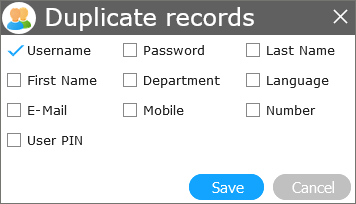
In the drop-down list to the right of Duplicate Records, you can decide how to handle duplicates.
When you are ready, click on Continue and the import will start. Once the import is finished, a summary will be displayed.

