This page is optimized for desktop computers and tablets. To access it, try one of the following points:
- Access this page from a different device.
- If you’re on a tablet, rotate it.
- Check the “Desktop site” option in your browser settings.
This page is optimized for desktop computers and tablets. To access it, try one of the following points:
The COC Configurator is a web-based tool for managing the configuration of the COC system. It allows authorized users to manage clients, organize them into groups, set up HTML panes, and — for administrators — adjust system-wide settings and monitor live system activity.
The application runs in a web browser and communicates with the COC server in real time. No installation is required on your computer.
The Configurator recognizes two types of users:
Administrators have full access to all sections of the application:
Group admins have access to a subset of sections:
Info: Sections and features that are restricted to Administrators are marked throughout this manual with the label [Administrator only].
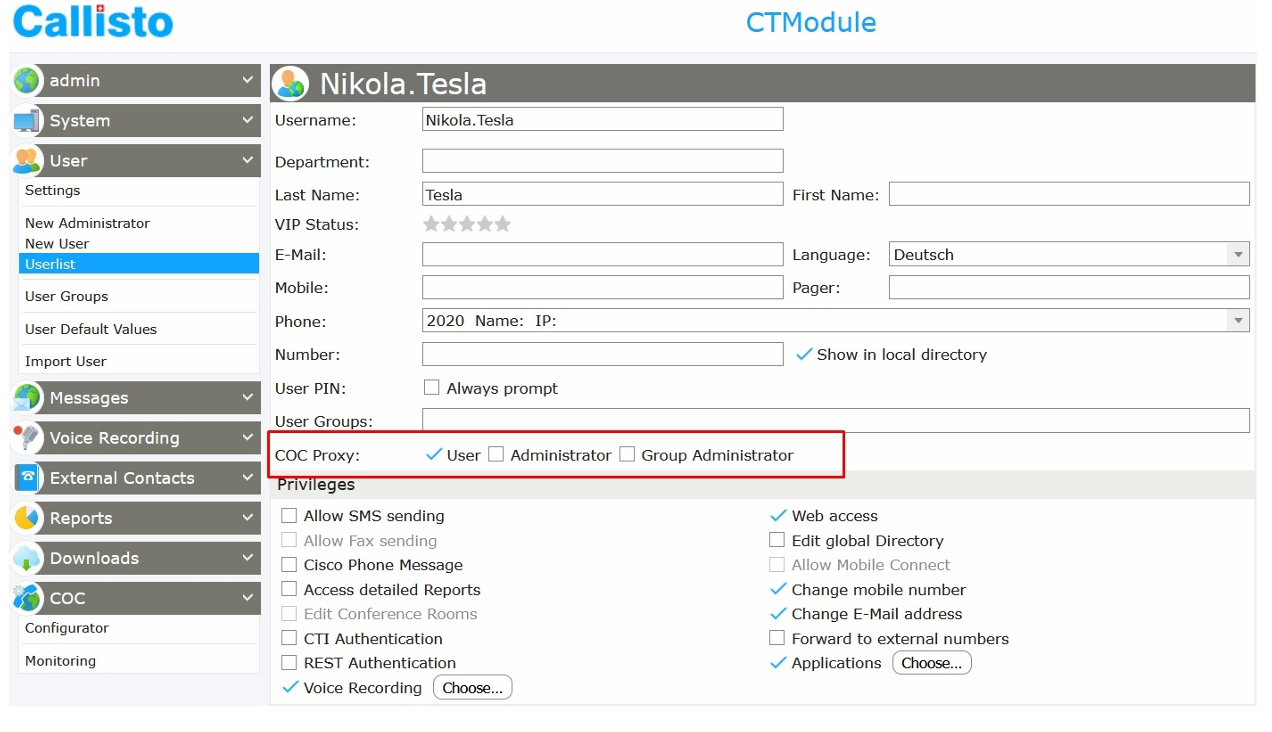
The Configurator is accessed through Callisto, the main application platform. Your administrator will provide you with a Callisto username and password.
To open the Configurator:
Info: Your identity and access level are carried over automatically from your Callisto login — no separate login is required.
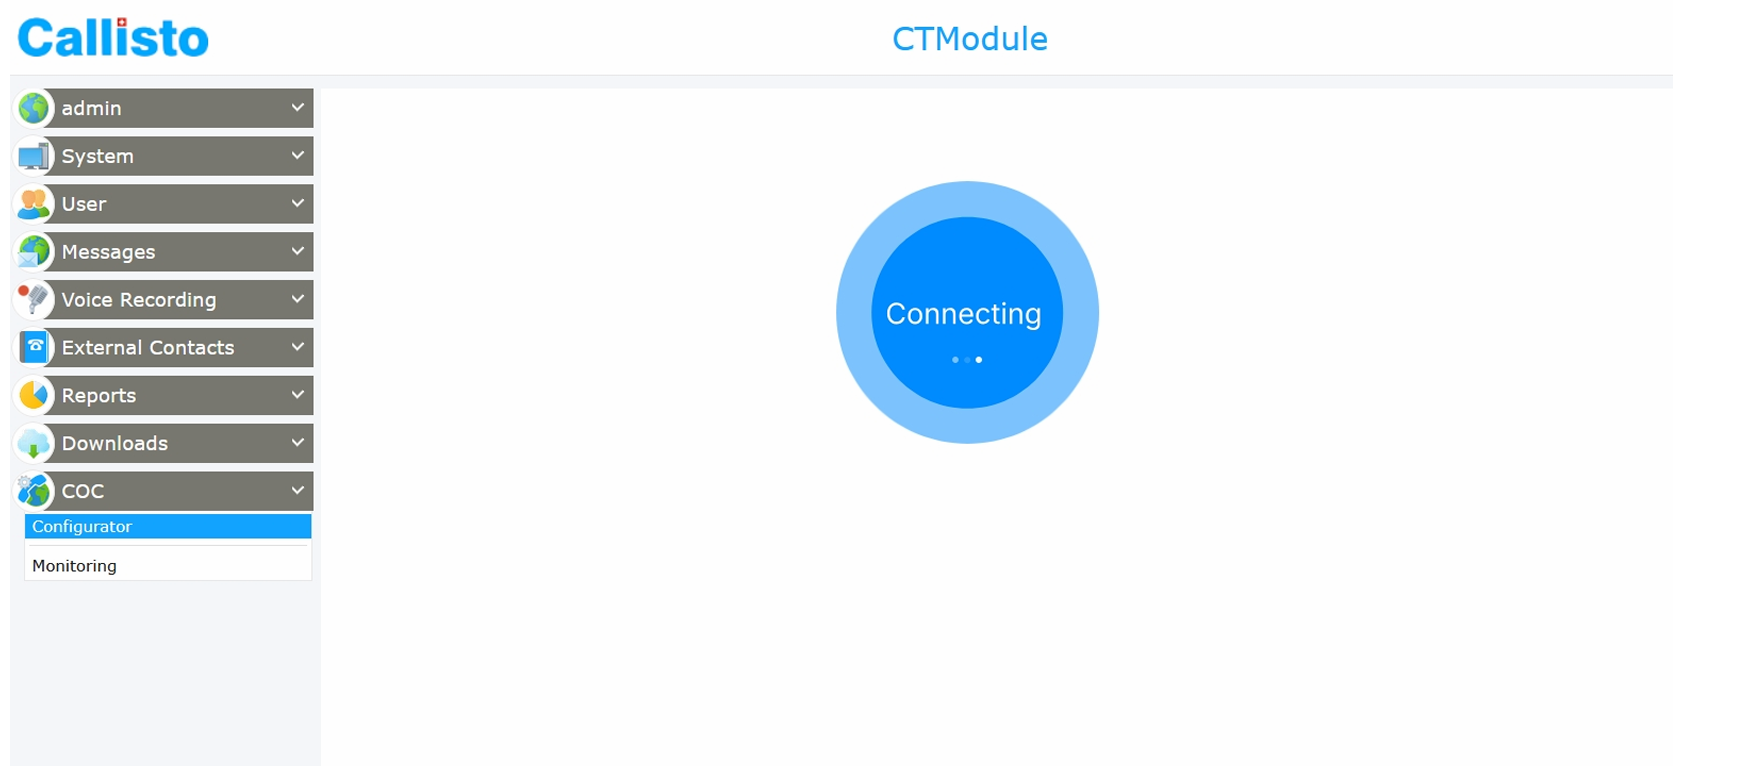
A brief loading animation is displayed while the application connects to the COC server. Once the connection is established, the main screen appears.

At the top of the screen is the navigation bar. It contains tabs that let you switch between different sections of the application. The tabs available to you depend on your role:
| Clients | Administrator, Group Admin |
| Groups | Administrator, Group Admin |
| Group Admins | Administrator only |
| HTML Panes | Administrator, Group Admin |
| Settings | Administrator only |
Click any tab to switch to that section. The currently active tab is highlighted.
While the application is connecting to the server, a loading animation is displayed in the center of the screen. Once connected, it disappears and the content of the selected section loads automatically.
Important: If the server does not respond in time, a timeout message is shown. In this case, refresh the page or contact your administrator.
Short notification messages appear in the corner of the screen to confirm actions or report errors. They disappear automatically after a few seconds. Examples:
The Clients section lists users (clients) and allows you to review and edit their settings. The list of clients you can see depends on your role:
New clients are created in Callisto, not in the Configurator itself. Once created in Callisto, the client will automatically appear in the Configurator's Clients section.
To add a new client:
The user will now appear as a client in the Configurator.
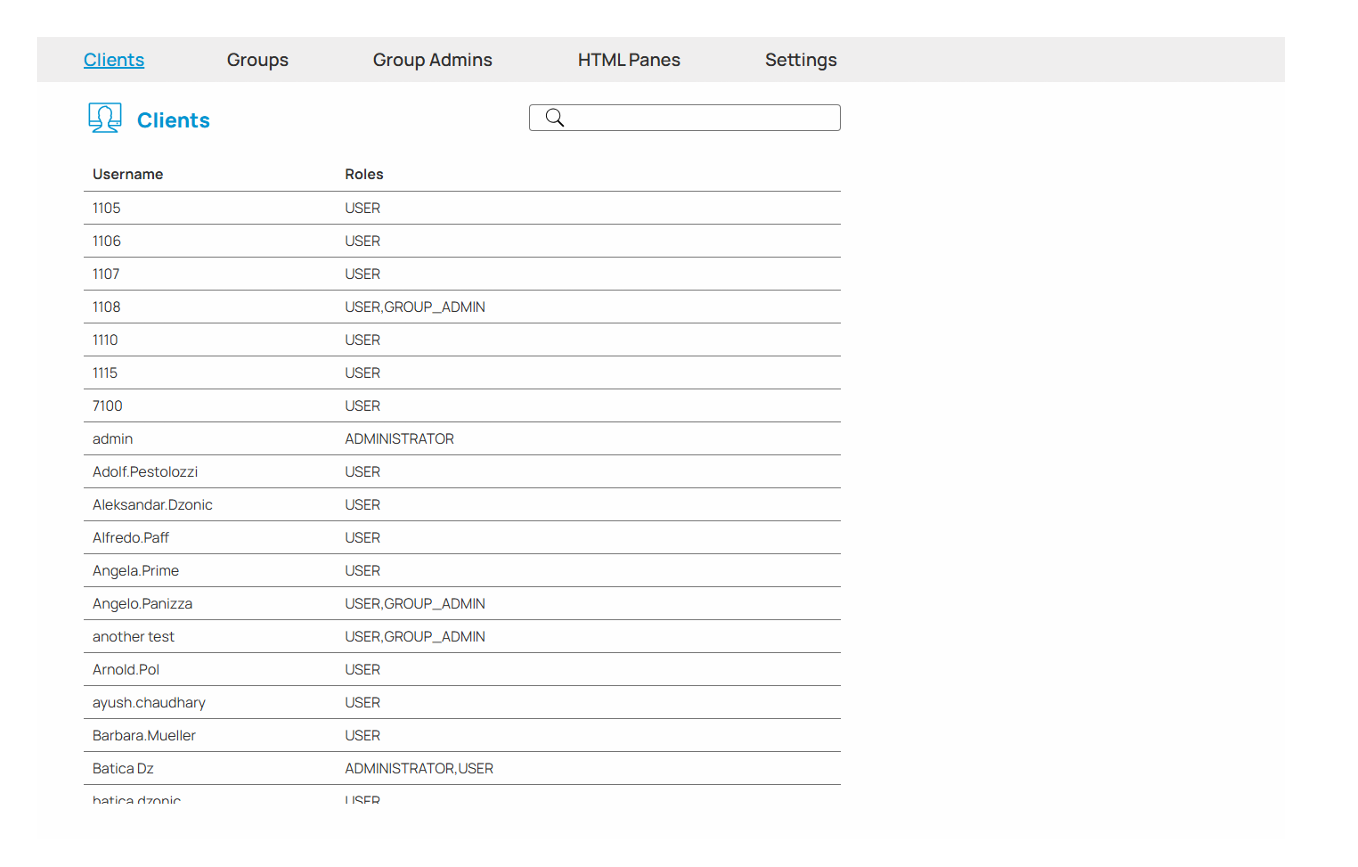
When you open the Clients tab, a table of clients is displayed, sorted alphabetically by username.
To find a specific client, type their name in the search bar at the top. The list filters in real time as you type.
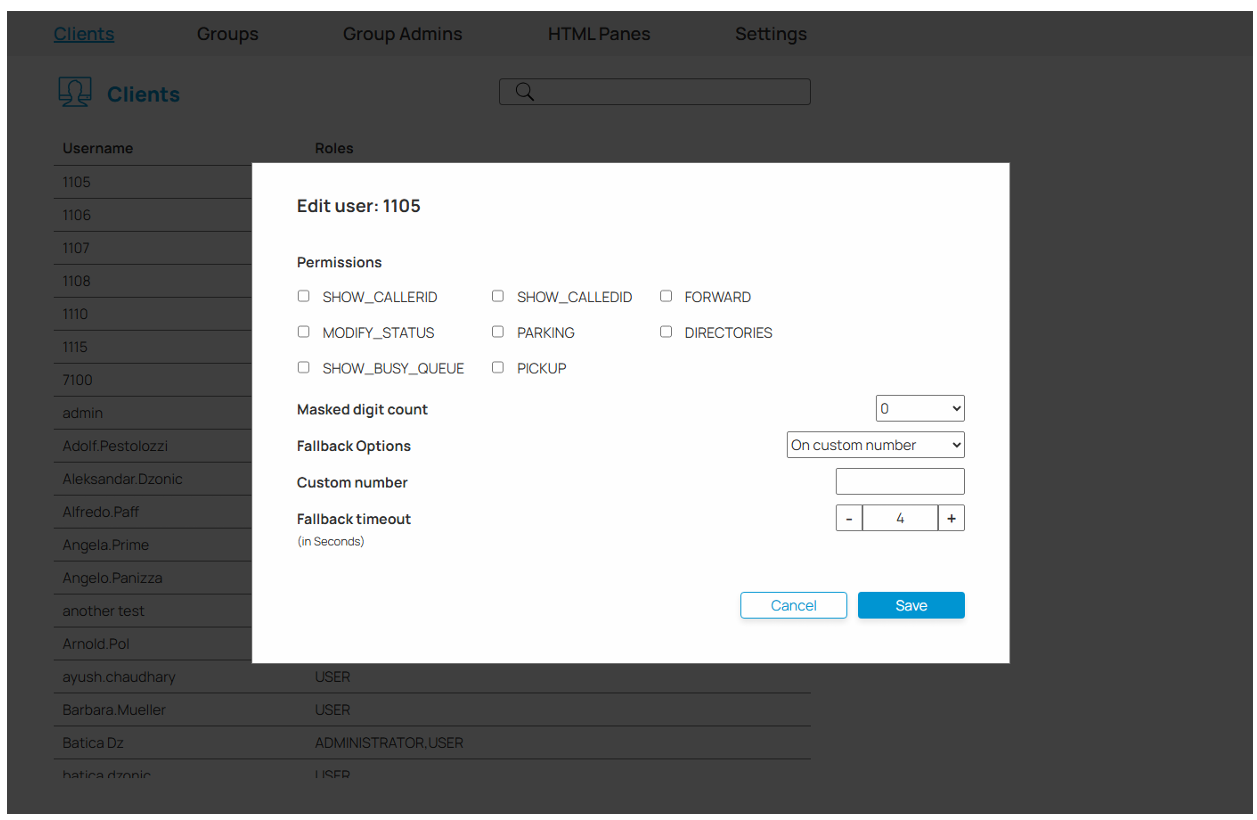
To edit a client's settings, click the Edit button (pencil icon) next to their name in the table. A dialog window opens with the client's current configuration.
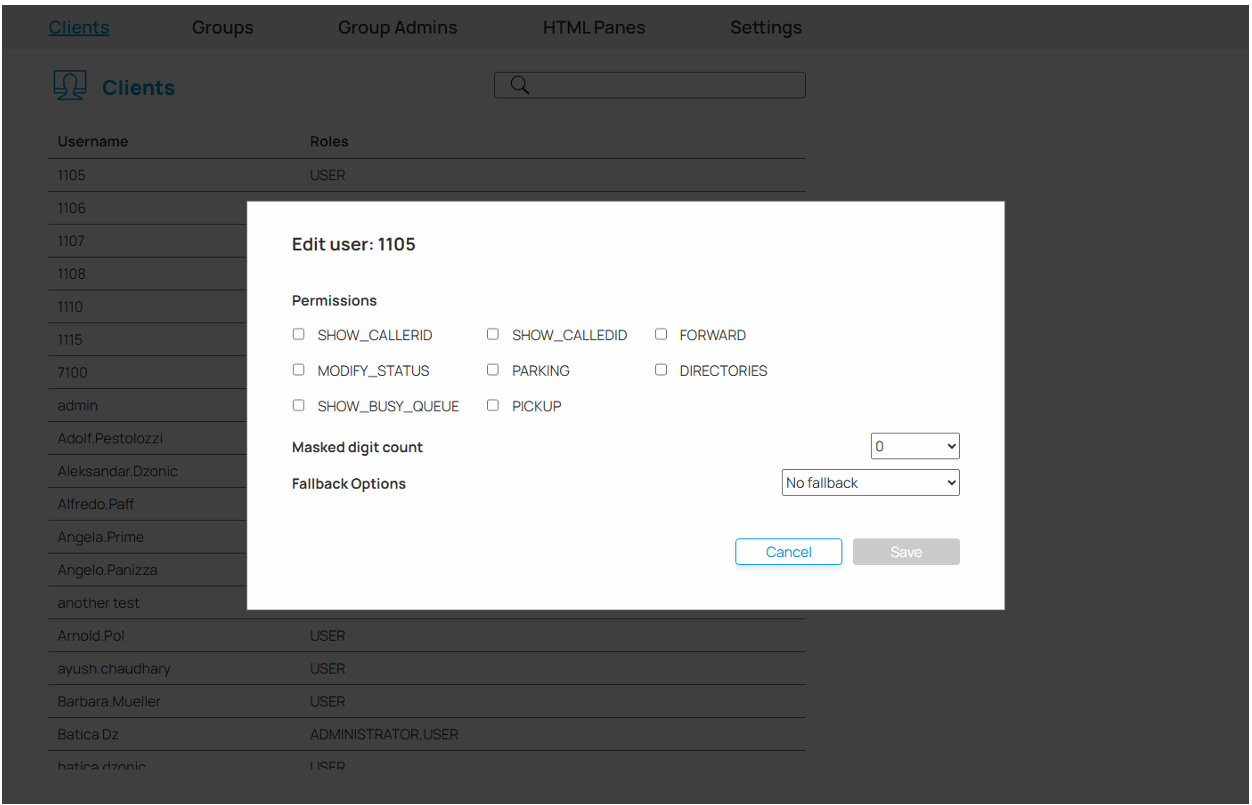
The dialog contains the following settings:
A list of checkboxes showing what the client is allowed to do within the system. Check a box to grant a permission; uncheck it to remove it. The available permissions are defined by the system and may vary per installation.
Controls how many digits of phone numbers are hidden (masked) when displayed for this client. Use the dropdown to select a value from 0 (no masking) to 9, or All to mask the entire number.
This setting is useful for privacy — for example, to prevent a user from seeing full phone numbers.
Determines what happens if a call cannot be completed normally. Three options are available:
Visible only when On custom number is selected. Enter the phone number to which calls should be redirected.
Visible when either On initiator number or On custom number is selected. Specifies how many seconds the system waits before triggering the fallback. The allowed range is 4 to 300 seconds. Use the + and – buttons to adjust the value.
Info: The Save button is disabled if no changes have been made. Click Cancel to discard changes and close the dialog.
The Groups section lets you organize clients into logical groups. Groups are used to control what each client can see and access in the COC Client application.
When you open the Groups tab, a list of groups is displayed. You can use the search bar to filter by group name. The groups you can see depend on your role:
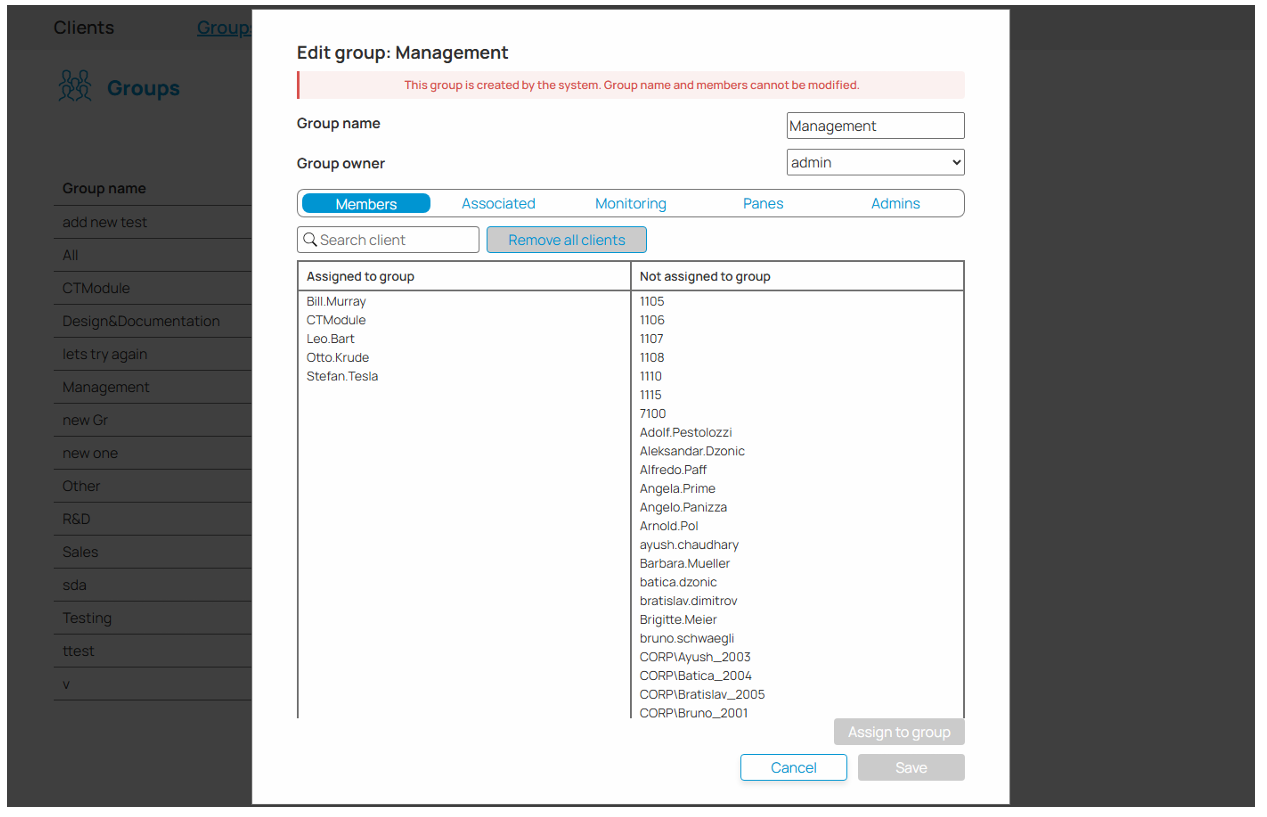
Info: Some groups are marked as system groups — these are created automatically by the COC system. Their name and members cannot be changed.
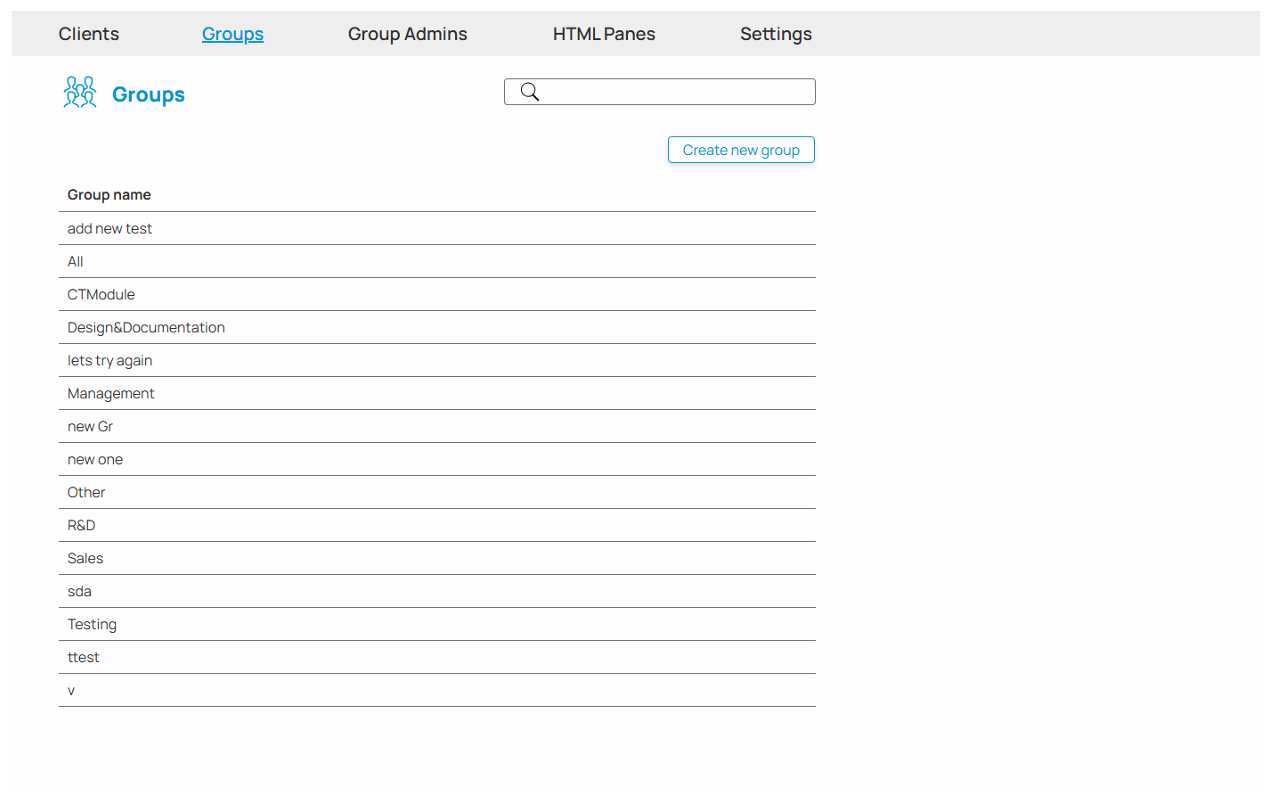
Click the Create new group button above the group list. A dialog window opens where you can define the new group's name and configure its assignments.
Click the Edit button next to a group's name to open its editing dialog. The dialog contains the following:
The name of the group. This field is disabled for system groups and cannot be changed.
A dropdown that lets you assign an owner to the group. The owner is a client from the list of available clients.
Below the group name and owner, there are tabs that let you manage what is assigned to this group. Click a tab name to switch between them.
In each tab, the left-hand list shows items currently assigned to the group. The right-hand list shows items available to be added. To move items between lists, select them first and then use the action button located below the lists (the button label changes depending on the context — Assign, Unassign, or Exchange).
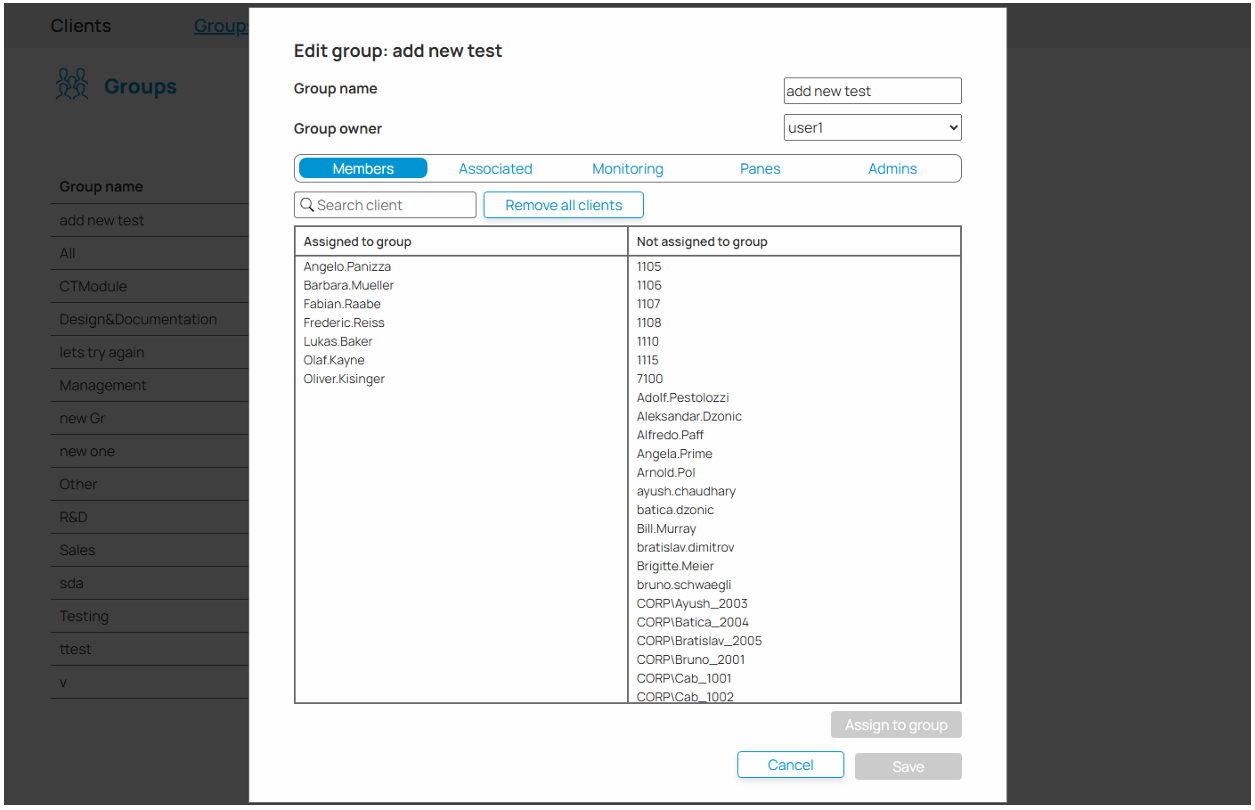
Members are the users who make up this group. The Members tab lets you define which users belong to the group.
If you are a Group Admin, the list of users you can choose from is limited to members of the groups assigned to your scope. You will not see users outside of that scope.
Important: If a member of this group does not belong to any of your scope groups, you can still see them in the assigned list — but if you remove them, you will not be able to add them back, since they will no longer appear in your available list.
This tab is disabled for system groups.
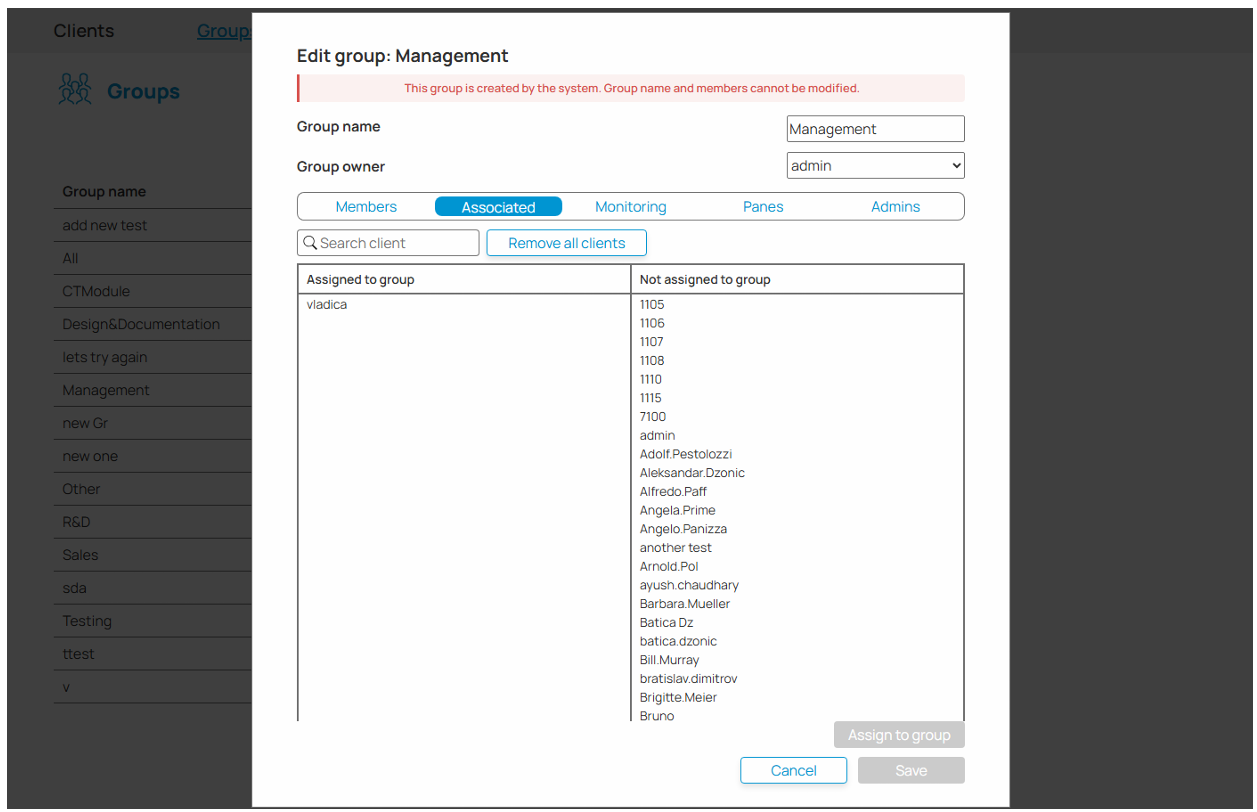
Associated clients are the COC Client application users who can see this group in their contacts sidebar. Assigning a client here makes the group visible to them in the COC Client application.
If you are a Group Admin, the list of clients available to assign is limited to members of the groups in your scope — the same restriction that applies to the Members tab.
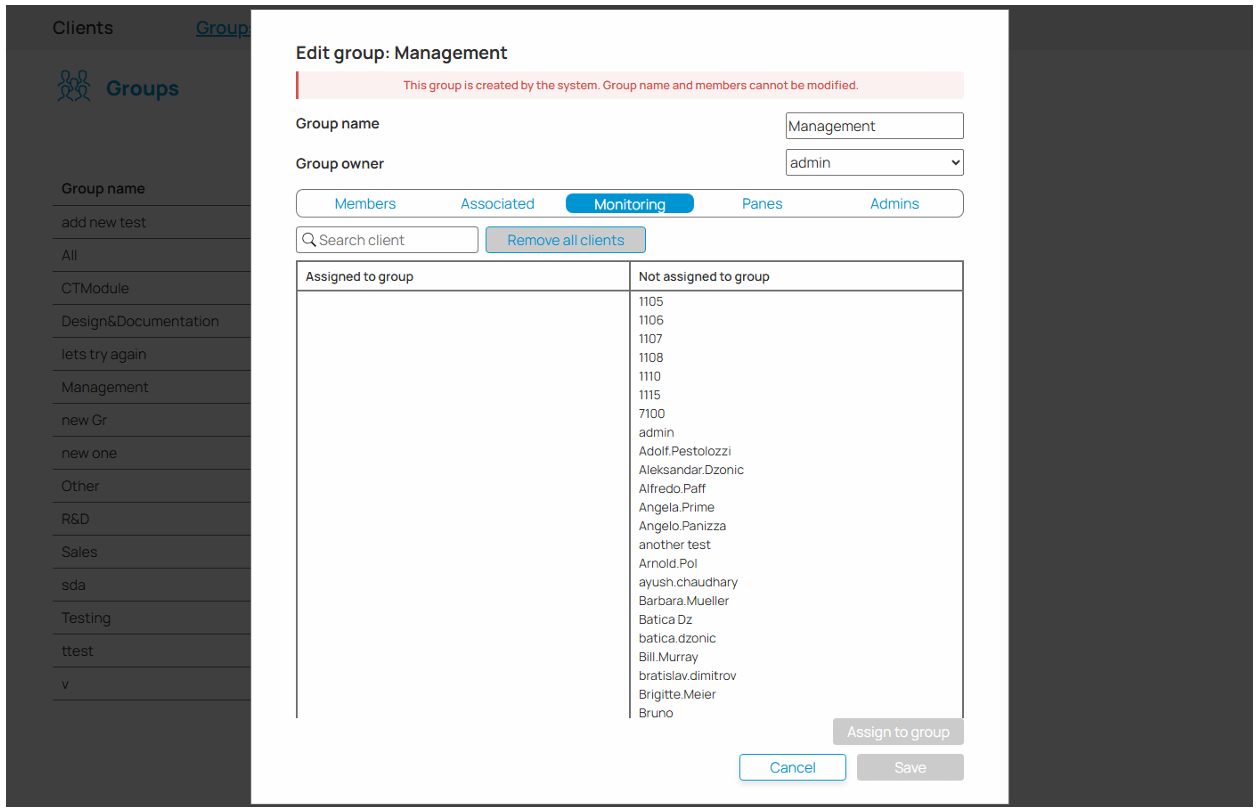
Monitoring clients are Operators who are given the ability to monitor live calls within this group and to coach other agents during those calls. Assigning a client here grants them that capability for this group.
If you are a Group Admin, the list of clients available to assign is limited to members of the groups in your scope.
Info: For more details on how monitoring and coaching work from the Operator's perspective, refer to the COC Client application manual.
The Panes tab shows which HTML Panes are assigned to this group. Assigned panes will be visible to the group's clients in the COC Client application.
Adding and removing works the same way as the Members tab.

The Admins tab is visible only to Administrators. It shows which Group Admins are responsible for managing this group.
Adding and removing works the same way as the Members tab.
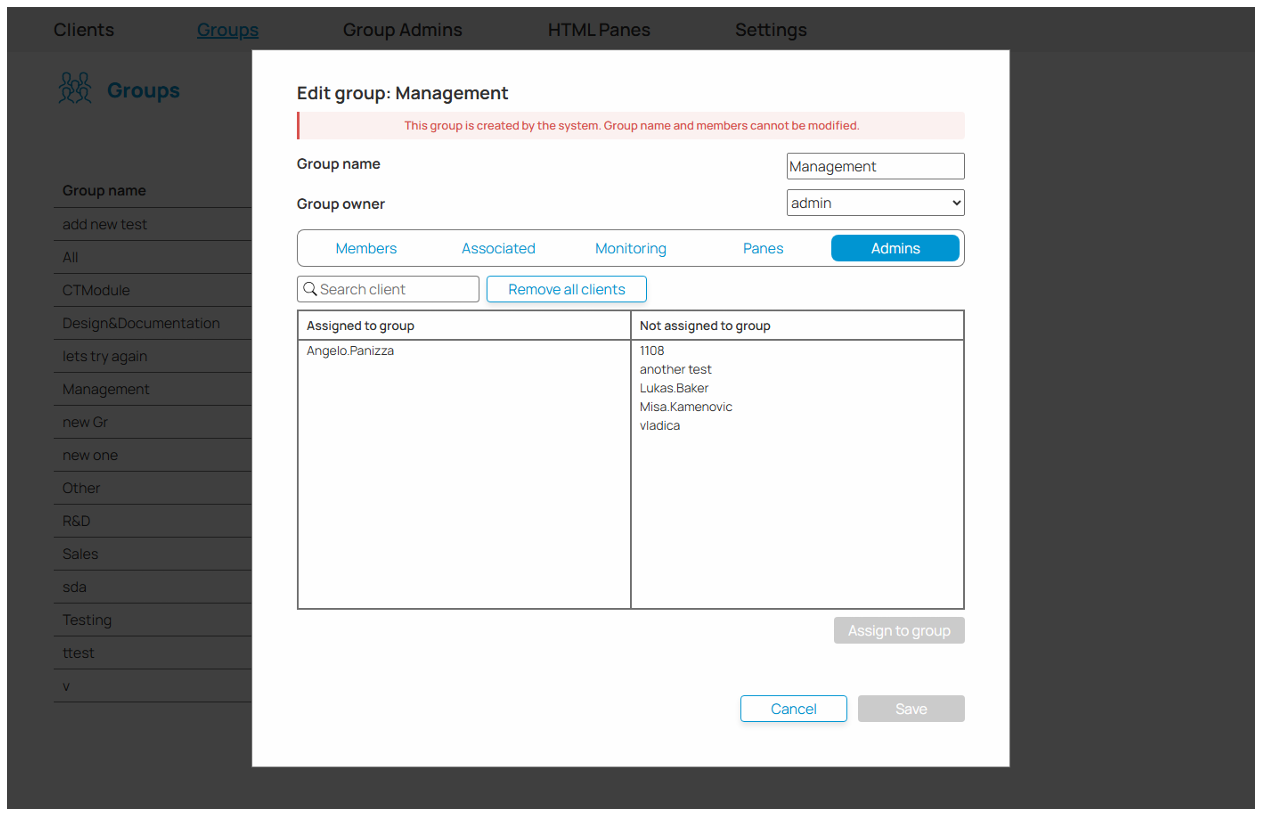
Info: The Save button is disabled if no changes have been made. Click Cancel to discard changes and close the dialog.
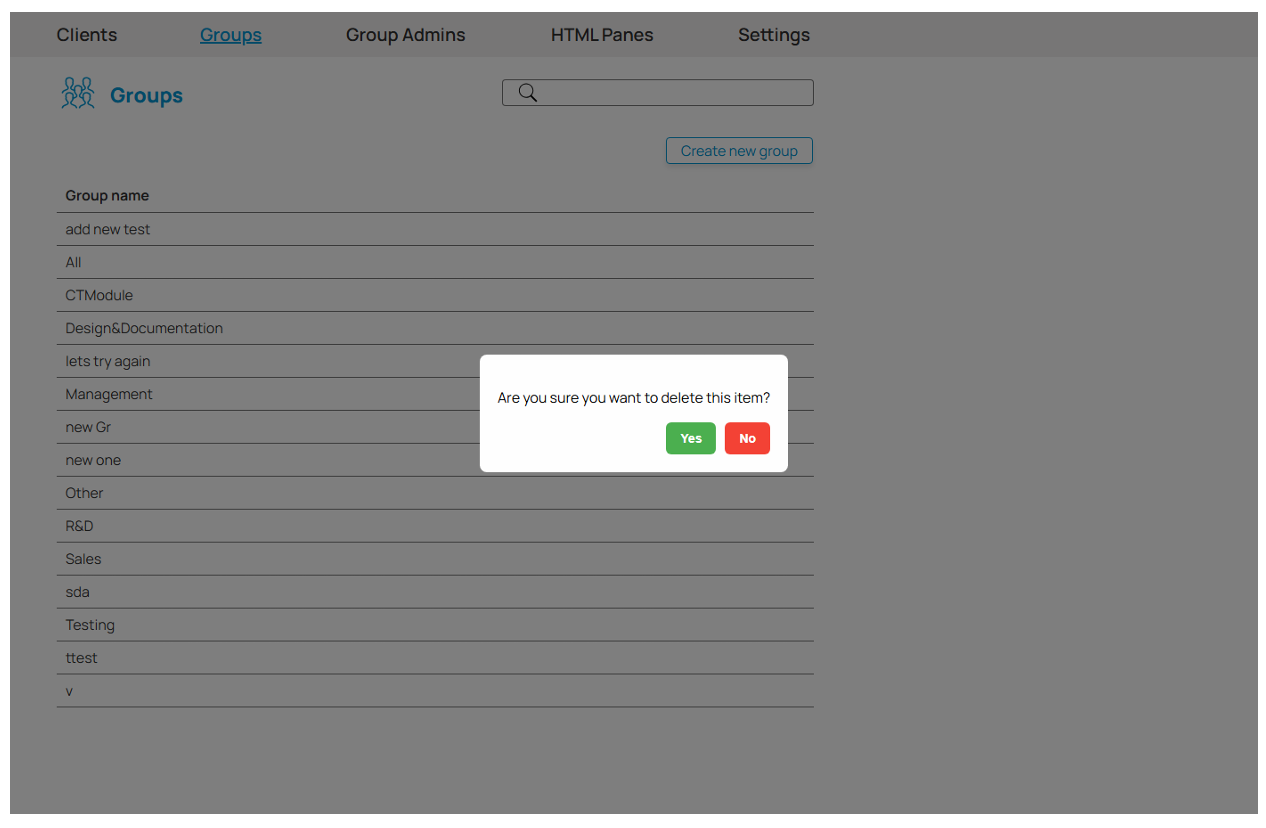
To delete a group, click the Delete button (trash icon) next to its name in the group list. A confirmation dialog will appear asking you to confirm. Click Confirm to proceed, or Cancel to abort.
Important: System groups cannot be deleted.
The Group Admins section manages users who have the Group Admin role. Its sole purpose is to define the scope of each Group Admin — that is, which groups' members they are allowed to see and assign when editing the groups they administer.
Being assigned to a Group Admin's scope does not give them any management rights over those groups. It only determines the pool of users they can pick from. For example, if Group Admin A has groups X and Y in their scope, they can only assign users who are members of group X or Y — no one else will be visible to them.
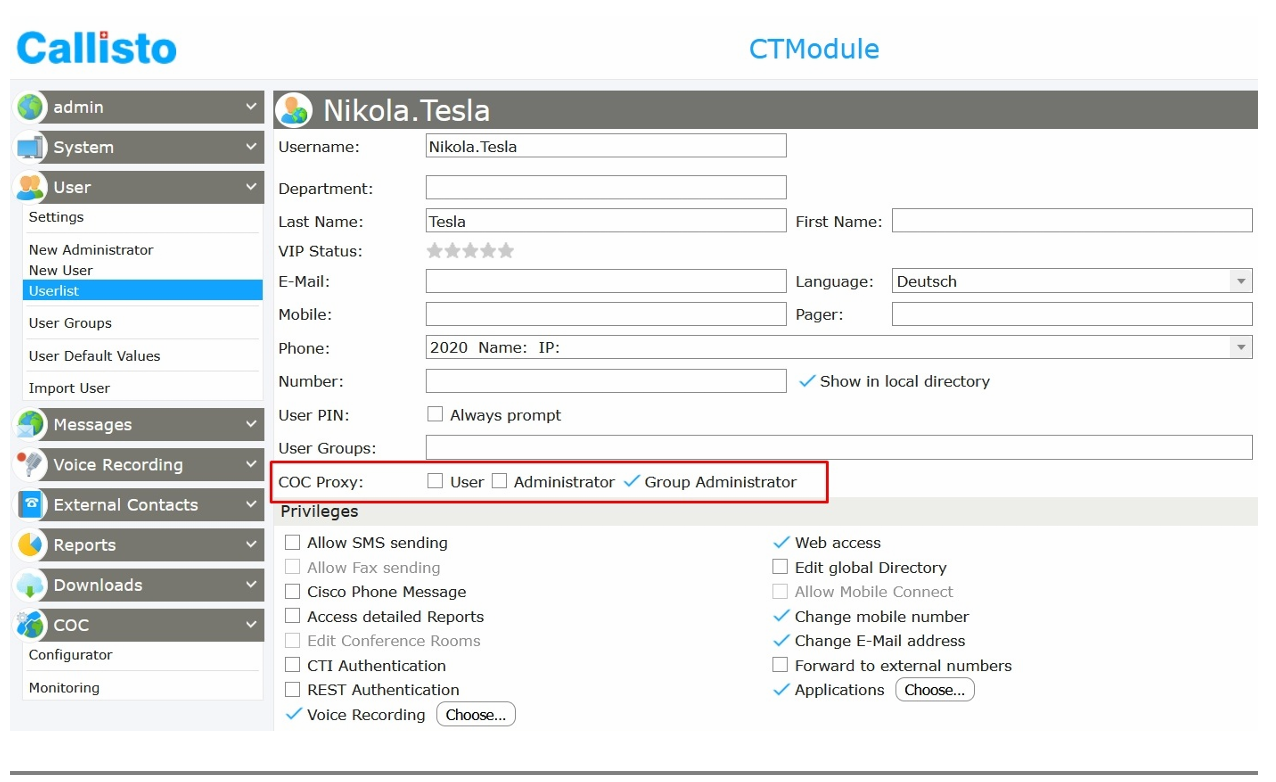
Group admins are created in Callisto. Once assigned the Group Admin role there, the user will appear in the Configurator's Group Admins section where their scope can be configured.
To add a new group admin:
The user will now appear in the Group Admins section of the Configurator, where you can set their scope.
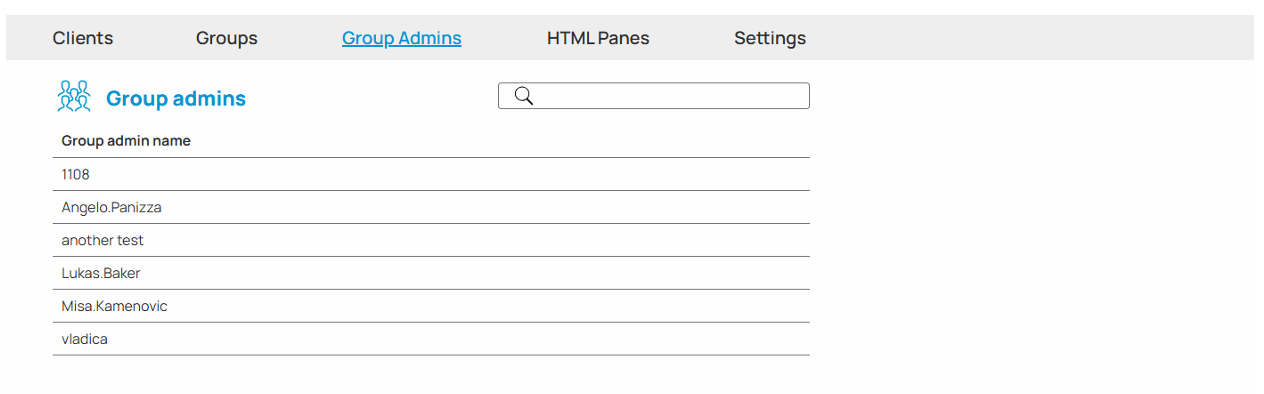
When you open the Group Admins tab, a list of all users with the Group Admin role is displayed, sorted alphabetically. Use the search bar at the top to filter by name.
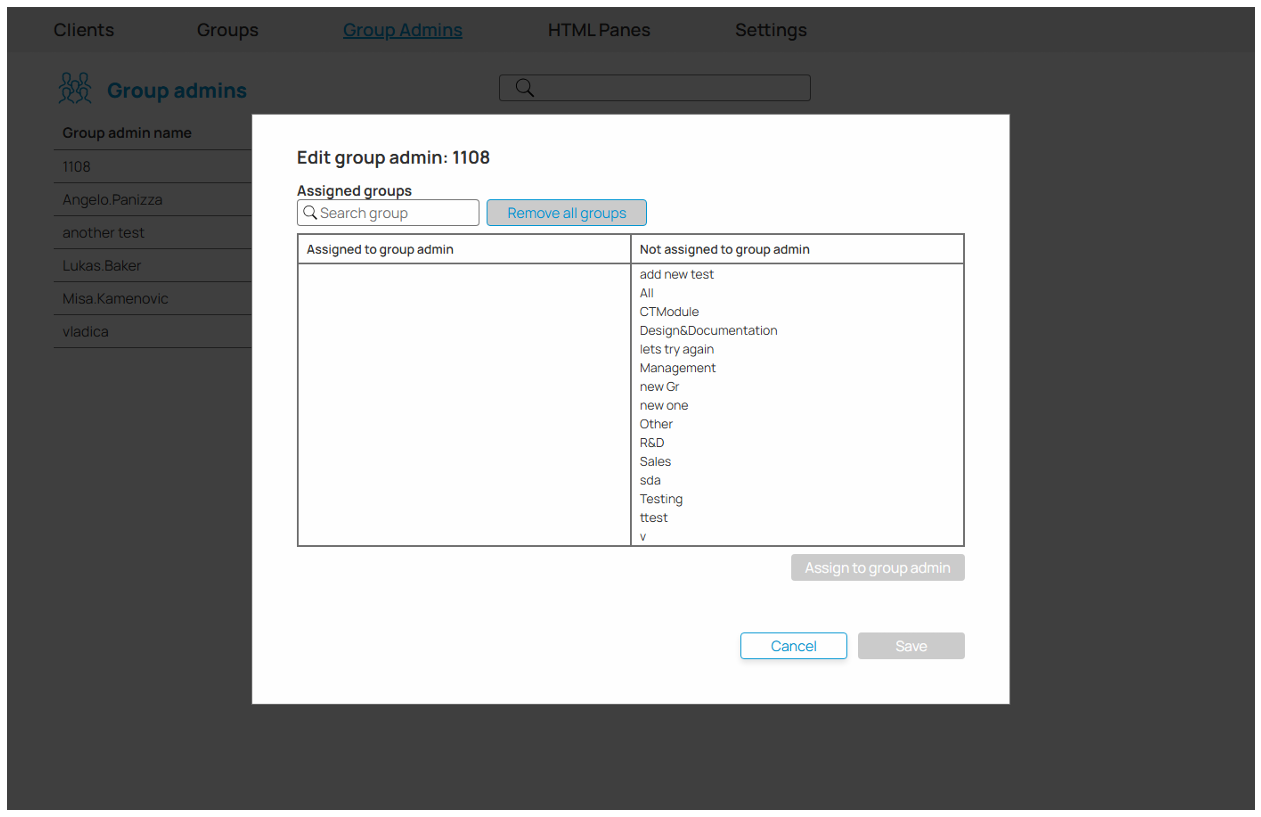
Click the Edit button next to a group admin's name to open their editing dialog. The left list shows groups currently in their scope; the right list shows groups available to add.
Select a group and use the button below the lists to Assign or Unassign it.
Info: The Save button is disabled if no changes have been made. Click Cancel to discard changes and close the dialog.
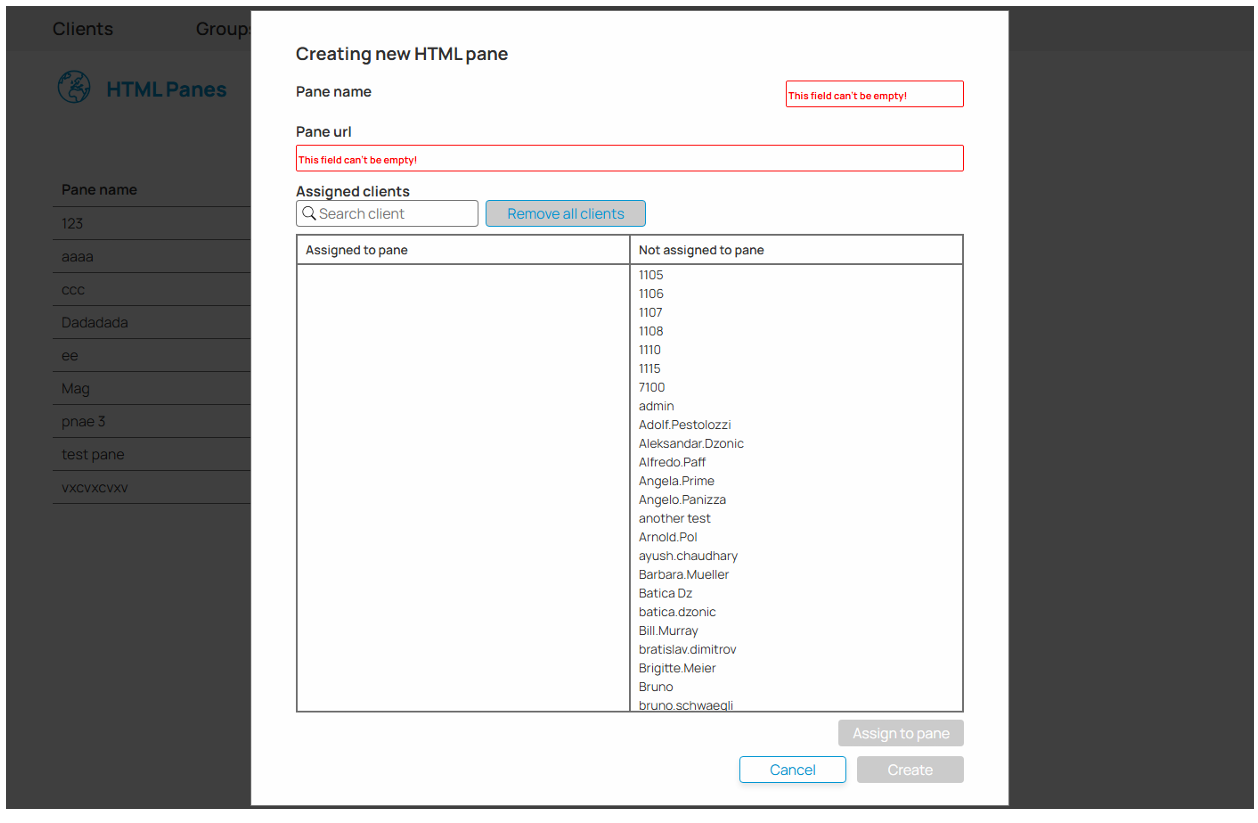
HTML Panes are custom web content panels embedded inside the COC Client application. Each pane loads a web page from a URL you define and is assigned directly to specific clients (users). Clients assigned to a pane will see it displayed inside their COC Client application.
When you open the HTML Panes tab, a list of all configured panes is shown. Each entry displays the pane name.
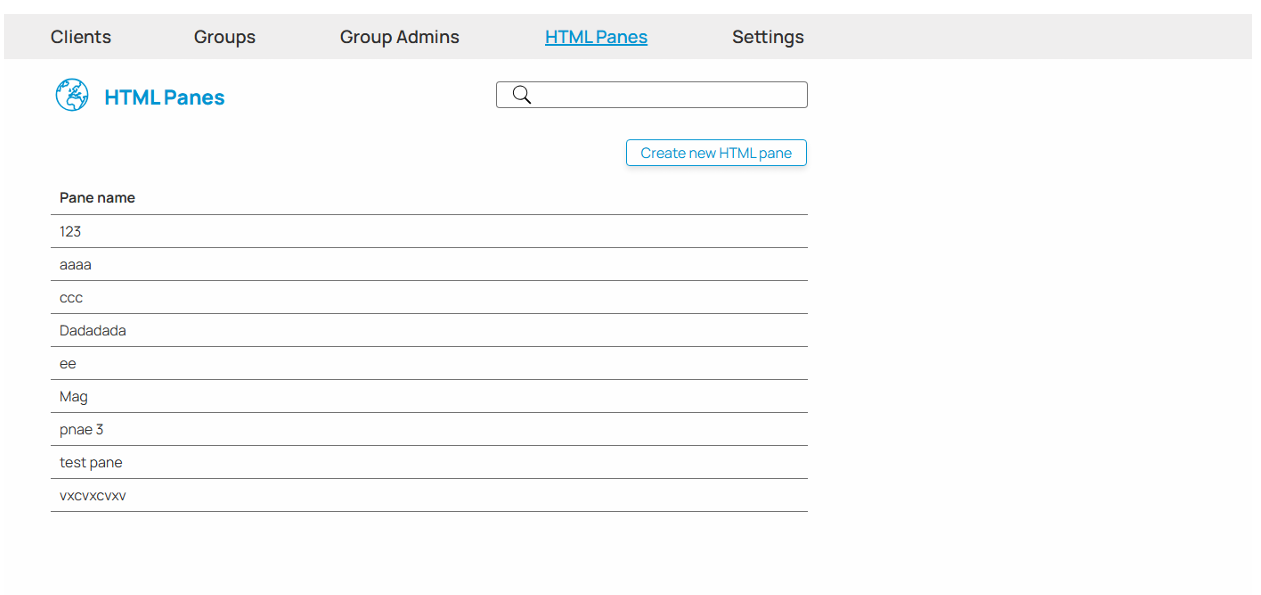
Click the Create new HTML pane button above the list. A dialog window opens with the following fields:
Fill in the fields and click Save.
Click the Edit button next to a pane's name to open its editing dialog. You can update the pane name, URL, and the list of assigned clients.
Info: The Save button is disabled if no changes have been made. Click Cancel to discard changes and close the dialog.
Click the Delete button next to a pane's name. A confirmation dialog will appear. Click Confirm to delete the pane permanently, or Cancel to abort.
Important: Deleting a pane removes it for all clients it was assigned to — those clients will no longer see it in their COC Client application.
The Settings section contains system-wide configuration options. Changes here affect the entire COC installation.
Use the search bar at the top to quickly find a specific setting by name.
After adjusting settings, use the Save button to apply all changes, or Reset to discard any unsaved changes and restore the last saved values.
JTAPI settings control how the COC server connects to the Cisco Unified Communications Manager (UCM).
| Setting | Description |
| Use UCM credentials | When enabled, the system uses the UCM login credentials instead of a separate JTAPI username and password. The username and password fields below are hidden when this is on. |
| JTAPI username | The username used to authenticate with the JTAPI interface. |
| JTAPI password | The password for the JTAPI interface. |
| Enable JTAPI security | Enables encrypted/secure communication between COC and the UCM JTAPI interface. |
The following settings are visible when Enable JTAPI security is enabled:
| Setting | Description |
| CAPF profile instance ID | Identifier for the CAPF security profile. |
| Authentication string | Authentication passphrase used during secure setup. |
| CAPF IP | IP address of the CAPF server. |
| CAPF port | Network port used to connect to the CAPF server. |
| TFTP IP | IP address of the TFTP server used for configuration file downloads. |
| TFTP port | Network port used to connect to the TFTP server. |
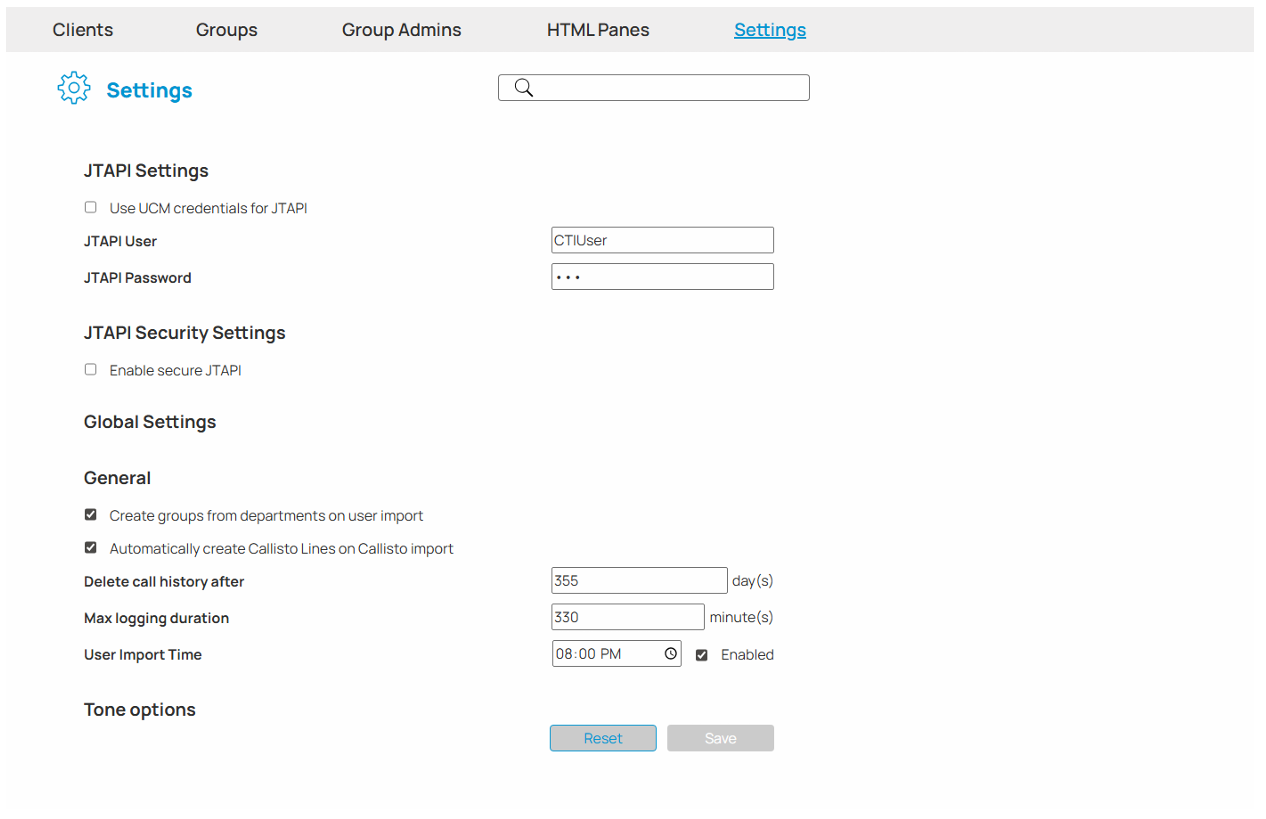
Global settings control general system behavior.
| Setting | Description |
| Auto-create groups from departments | When enabled, the system automatically creates a group for each department defined in the user directory. |
| Auto-create CTI lines | When enabled, CTI lines are created automatically for imported users. |
| Call history deletion interval | Number of days after which old call history records are automatically deleted. |
| User import time | The scheduled time of day at which the user import runs. |
| Enable user import | Enables or disables the automatic user import schedule. |
| Monitoring tone option | Determines on which side a tone is played when monitoring is active. Options: None, Remote Side, Local Side, Both Sides. |
| Recording tone option | Determines on which side a tone is played when recording is active. Options: None, Remote Side, Local Side, Both Sides. |
| CTI port | The CTI port used by the system. |
| CTI port address | The specific address associated with the selected CTI port (visible when a port is selected). |
| Max logging duration | The maximum number of minutes a tracing/logging session can run. The maximum allowed value is 480 minutes (8 hours). |
Click Save to send all current settings to the server and apply them.
Click Reset to undo any changes you have made since the last save and return to the previously saved values.
The Monitoring section provides a real-time view of what is happening in the COC system — which devices are active, what calls are in progress, and what the system logs are recording.
Monitoring is accessed through Callisto, the same way as the Configurator:
Info: Only users with the Administrator role can access this mode.
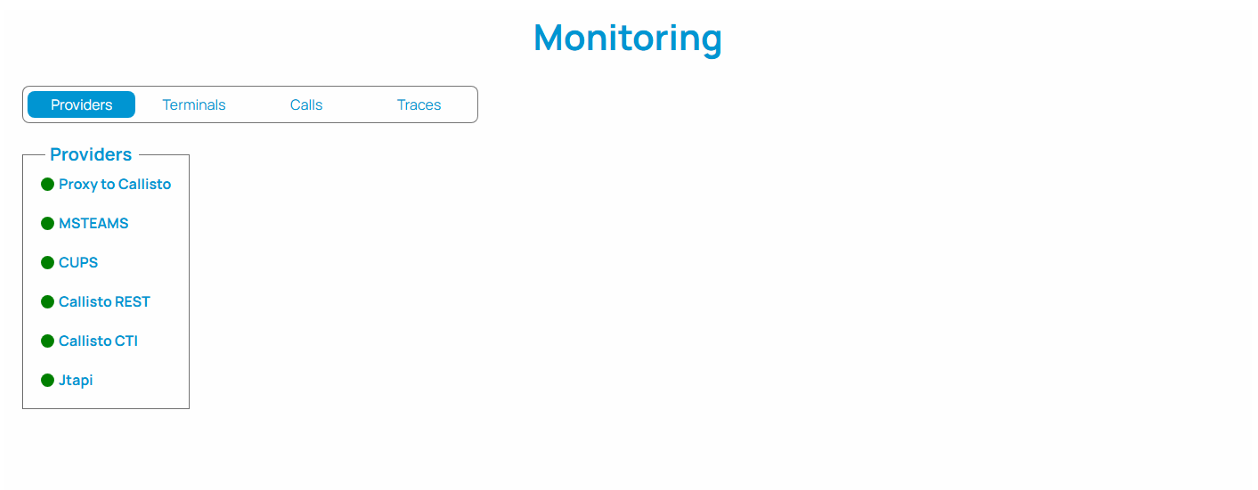
Once open, the screen shows four monitoring views: Providers, Terminals, Calls, and Traces. Click each tab to switch between them.

The Providers view shows the current status of each telephony provider connected to the COC system. Each provider is displayed as a colored indicator:
| Color | Status |
| Green | IN_SERVICE — the provider is fully operational. |
| Yellow | INITIALIZING — the provider is starting up or reconnecting. |
| Red | Other states (e.g. OUT_OF_SERVICE) — the provider is not available. |
This view updates automatically in real time.
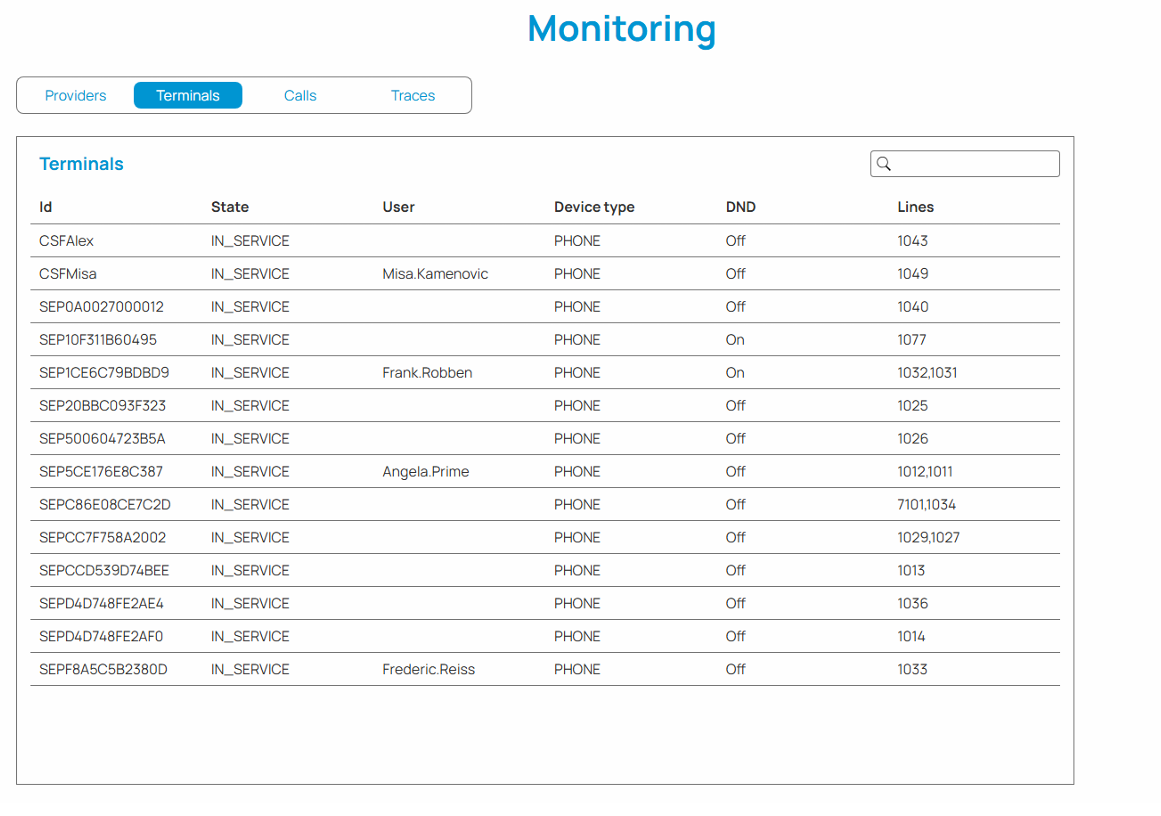
The Terminals view shows a table of all telephony devices (terminals) registered in the system, along with their current state. The table includes the following columns:
| Column | Description |
| Device name | The identifier of the terminal/device. |
| State | Current state of the device (e.g. idle, busy). |
| Assigned user | The user currently associated with this device. |
| Do Not Disturb | Indicates whether DND is active on this device. |
| Lines | The phone lines assigned to this terminal. |
You can sort the table by clicking on a column header, and filter by typing in the search bar.
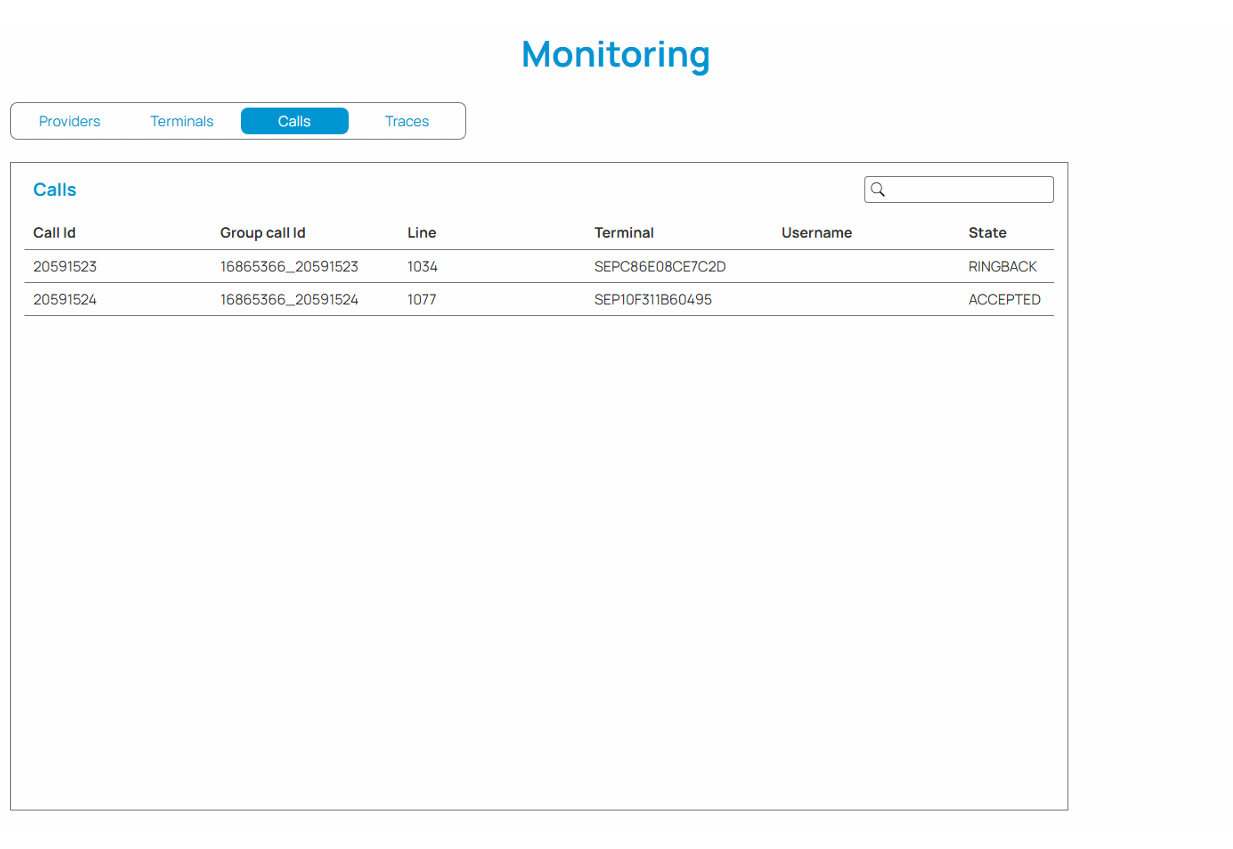
The Calls view shows a live table of all active calls currently in the system. The call duration counter updates every second. Calls that end are removed from the table automatically.
The Traces view allows you to enable system logging for diagnostic purposes. Use this section when troubleshooting issues at the request of your administrator or support team.
Check the Enable tracing checkbox to start a logging session. Uncheck it to stop.
Select the level of detail for the logs from the dropdown:
| Level | Description |
| Severe | Only critical errors are logged. |
| Warning | Errors and warnings are logged. |
| Trace | Detailed trace information is logged. |
| Info | General informational messages are logged. |
Enter the number of minutes the tracing session should run. The maximum duration is defined by the system setting Max logging duration (see section Global Settings). The current maximum is shown next to the input field. This field is disabled while tracing is active.
When tracing is active, the username of the person who started the session is displayed below the settings.
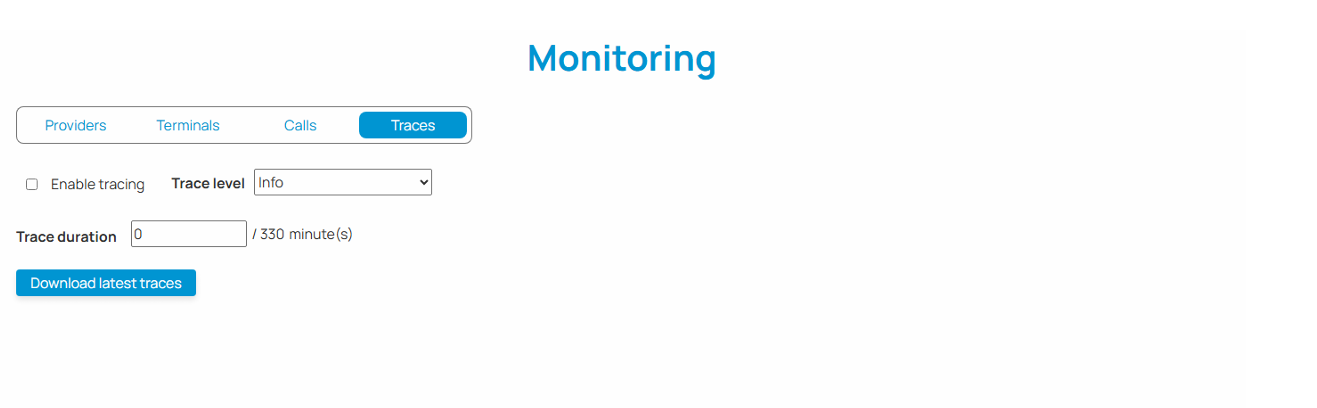
Once a tracing session has ended, click the Download latest traces button to download the most recent log file to your computer. The button is available only when tracing is not currently running.
The file will download automatically to your browser's default downloads folder.

